The PITAs
18 September 2020
Introduction
Being stuck at home due to COVID-19-related restrictions, I thought I'd
pass the time by undertaking another speaker project. I was not
sure which project to undertake though until, in cleaning out my garage
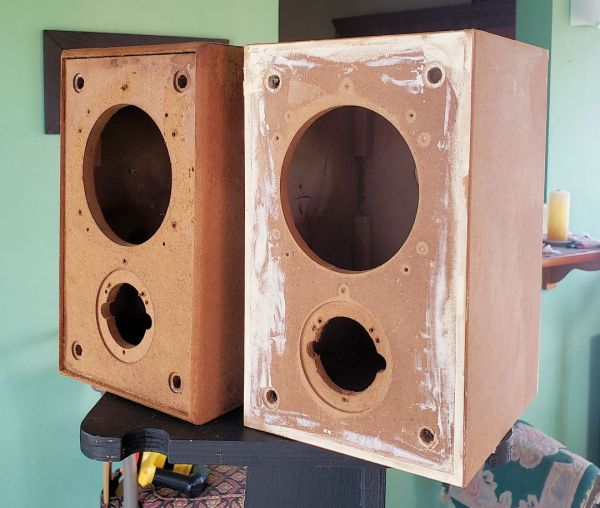
cupboards, I came across a pair of old speaker boxes. These were the
original boxes for a rebuild project that I did for a friend back in
2007 (it's listed on my "Projects" page), and I eventually replaced them
with new boxes when the originals suffered water damage.
So now, at least thirteen(!) years later, I decided to to something with the boxes.
The first step in restoring them involved removing the peeling vinyl cover. I was not sure what would be the best way to do this, until I came across a post on an Internet forum where the poster said they they were able to do so easily with a heat gun. And yes, using a heat gun on the vinyl did work (it shrunk and the heat softened the glue enough for me to easily peel it off. Some of the glue still remained on the 1/2" MDF boxes, but I got this off with a bit of acetone.
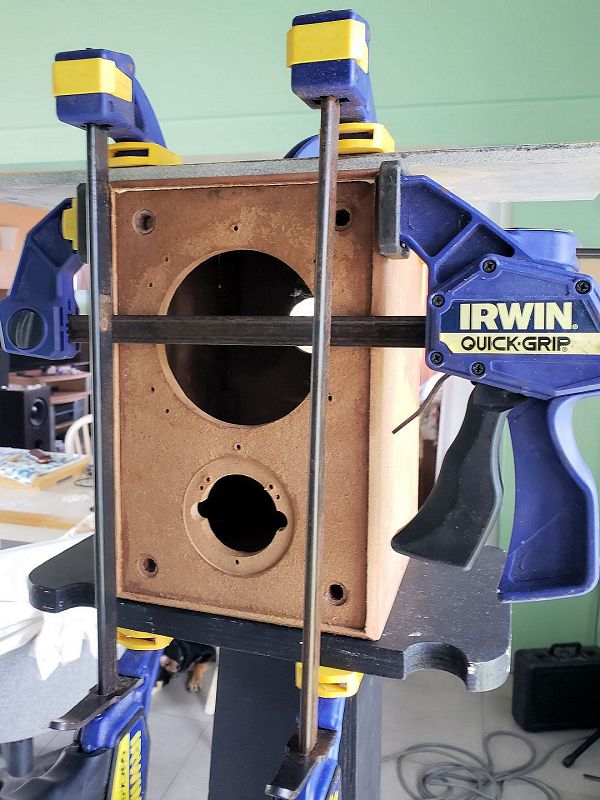
The next step involved repairing the water damage that was done to the boxes, and that took some time. It looked like the boxes were basically being held together by the vinyl, and simply fell apart when it was removed, so I had to glue them back together and then address the sections that were no longer flat. I also removed the small "lips" that were on the edges of the front and back panels. Overall this took a few weeks of work. It would have probably been faster if I made new boxes instead!
Once I completed the work on restoring the boxes, I decided to cover them with Duratex paint, as I still wasn't sure what purpose I'd put them to, and the Duratex would allow for both inside and outside use. My preference would have been to cover them in white Duratex, but that wasn't available at the time I was rebuilding the boxes, so I opted for black Duratex instead, three coats in total, the last two being thinned by a bit of water to ensure that the dried surface was not too rough.
The panels for the refurbished box seemed pretty thin, so I covered them internally with a layer of Dynamat Extreme and then a 1/2" layer of Sonic Barrier adhesive acoustic foam. In hindsight, I should have probably inserted one or two cross-braces to reduce panel flex even further.
Driver Choices
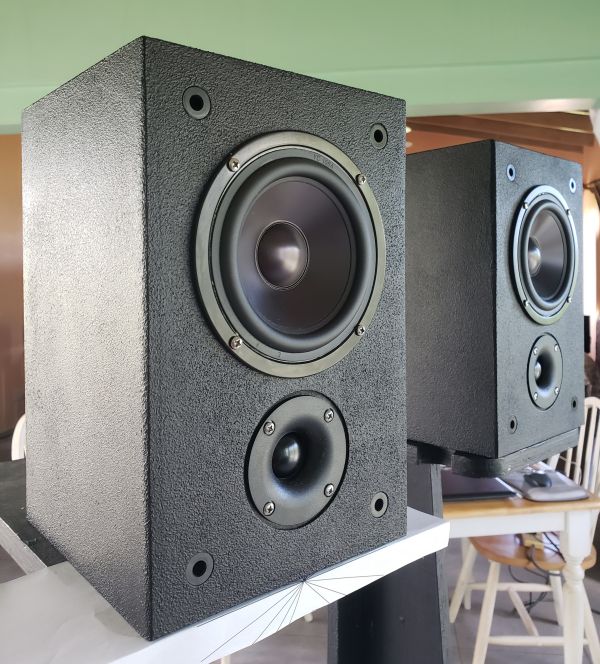
For this build, I decided to go with a passive radiator design, using
Dayton Audio's DSA135 bass driver (US$27 each) and the matching
passive radiator (US$14 each). I cut a hole in the rear of each
box to hold the passive radiator. As for the tweeter, I tried a
few, and I've currently settled on the Peerless BC25SC06-04 ($14 each),
and this was primarly driven by not only did were the mounting
dimensions a close match for the original tweeter cutouts in the boxes,
but also because the Peerless tweeters were mounted in small waveguides
which I thought would address some of the frequency response issues due
to baffle step diffration that I was experiencing with other tweeters
that I tried out in these boxes.


Crossover design
I took the same approach designing a new x-over for the chosen drivers
as I've done in the past - I measured both the impedance and frequency
response curves for the drivers, measured the z-axis offset for the
tweeters, and then used XSim to come up with a suitable x-over for them.
This time aroudn though, I managed to run into a number of challenges,
these being: (1) the DSA135 has a response peak around 7.5 kHz that
needs to be tamed, (2) the DSA135 has a peak in its distortion curve
around 3 kHz, and (3) the impact of baffle diffraction was causing the
tweeter's response to be noticeably non-flat around 3 kHz as well.
Because of (3), I couldn't cross over the tweeter much lower to reduce
the impact of the DSA135's distortion peak on the overall THD response.
Lucikly the distortion peak is small and not noticeable. I
eventually came up with the following, which I now think applies a bit
too much baffle step correction, but it does sound decent.
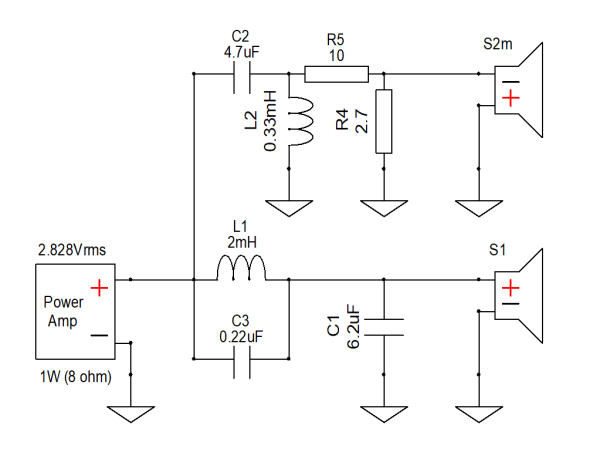
What's that 0.22 uF capacitor doing across the inductor in the woofer circuit? Well, that's there to add a "notch" filter that tames the peak in the DSA135's response at high frequencies.

Another note: while the x-over diagram shows a common ground, this speaker is configured to support biamping, so in the actual build I kept the ground path for the tweeter separate from the ground path for the woofer.
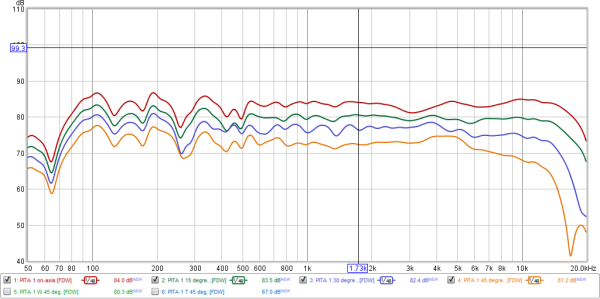
Interestingly enough, the response of this speaker with this x-over appears to be smoother at 15 degrees off-axis, as the image below shows.
Results
I think that the results
I've achieved seem to
be quite decent. I think I might have applied a little too much baffle
step correction, so I might replace the x-over at a later date with one
that reduces the amount of correction. The finished speakers don't
sound as "open" as my rebuilt Mission 751s, and I put that down to the
difference in baffle step correction between the two builds.
Further Notes:
The grille for these speakers really does a number on the frequency
response, making it considerably worse. So bad in fact that I'm
going to redesign the grilles in an effort to reduce this effect.
Related Projects:
External Links: